Adding new Items
When we originally created the TodoListView we added an "Add an item" button. It's time now to make that button do something. When the button is clicked we want to replace the list of items with a new view which will allow the user to enter the description of a new item.
Create the view
We start by creating the view (see here for a refresher on how to create a UserControl using a template):
Views/AddItemView.axaml
<UserControl xmlns="https://github.com/avaloniaui"
             xmlns:x="http://schemas.microsoft.com/winfx/2006/xaml"
             xmlns:d="http://schemas.microsoft.com/expression/blend/2008"
             xmlns:mc="http://schemas.openxmlformats.org/markup-compatibility/2006"
             mc:Ignorable="d" d:DesignWidth="200" d:DesignHeight="300"
             x:Class="Todo.Views.AddItemView">
  <DockPanel>
    <Button DockPanel.Dock="Bottom">Cancel</Button>
    <Button DockPanel.Dock="Bottom">OK</Button>
    <TextBox AcceptsReturn="True"
             Text="{Binding Description}"
             Watermark="Enter your TODO"/>
  </DockPanel>
</UserControl>
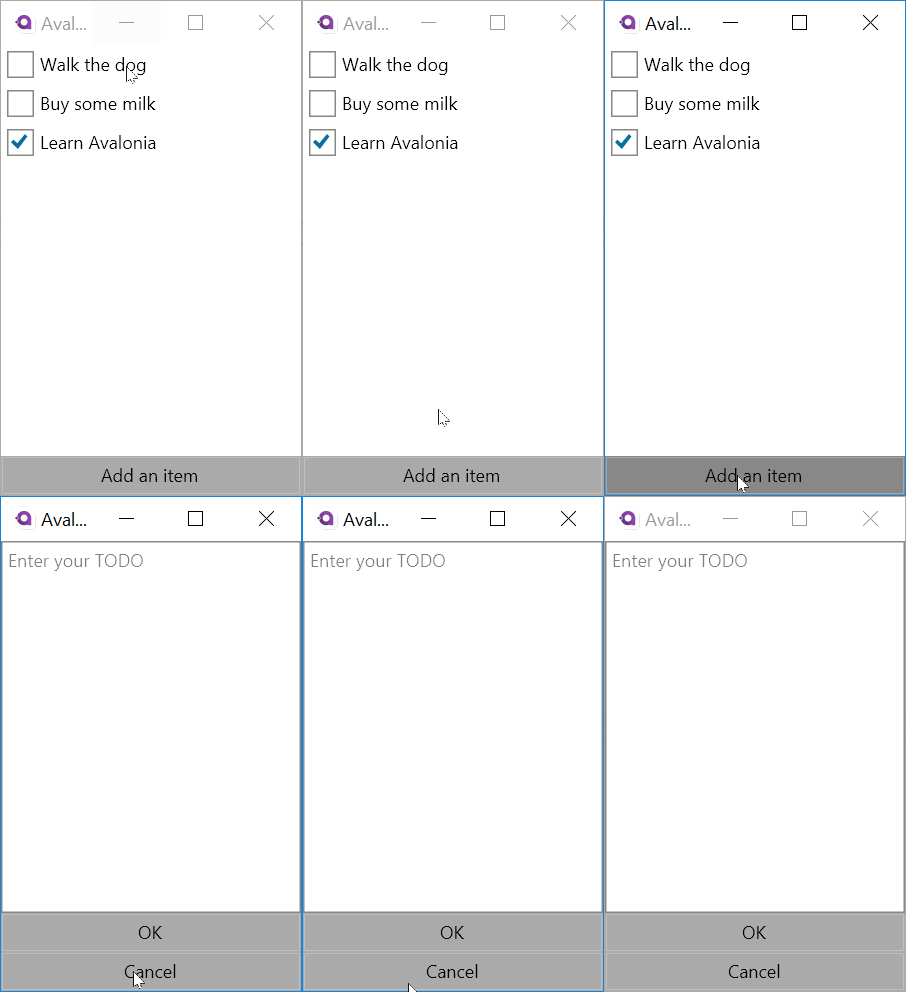
This gives us a view which looks like this:
The only new thing here is the <TextBox> control which is a control that allows a user to input text. We set three properties on it:
AcceptsReturncreates a multi-lineTextBoxTextbinds the text that is displayed in theTextBoxto theDescriptionproperty on the view modelWatermarkcauses a placeholder to be displayed when theTextBoxis empty
Create the view model
Our view model is going to start out extremely simple. We're just going to provide the Description property that the TextBox is bound to for starters. We'll add to this as we go along.
ViewModels\AddItemViewModel.cs
namespace Todo.ViewModels
{
    class AddItemViewModel : ViewModelBase
    {
        public string Description { get; set; }
    }
}
Swap out the list view model
When we click the "Add an item" button, we want to stop showing the TodoListView in the window and show the AddItemView. We can alter the MainWindowViewModel to let us do this:
ViewModels/MainWindowViewModel.cs
using ReactiveUI;
using Todo.Services;

namespace Todo.ViewModels
{
    class MainWindowViewModel : ViewModelBase
    {
        ViewModelBase content;

        public MainWindowViewModel(Database db)
        {
            Content = List = new TodoListViewModel(db.GetItems());
        }

        public ViewModelBase Content
        {
            get => content;
            private set => this.RaiseAndSetIfChanged(ref content, value);
        }

        public TodoListViewModel List { get; }

        public void AddItem()
        {
            Content = new AddItemViewModel();
        }
    }
}
Here we add a Content property which is initially set to our list view model. When the AddItem() method is called, we assign an AddItemViewModel to the Content property.
The Content property setter calls RaiseAndSetIfChanged which will cause a change notification to be fired each time the property changes value. Avalonia's binding system needs change notifications in order to know when to update the user-interface in response to a property change.
We now want to bind our Window.Content property to this new Content property instead of the List property that it is currently bound to:
Views/MainWindow.axaml
<Window xmlns="https://github.com/avaloniaui"
        xmlns:x="http://schemas.microsoft.com/winfx/2006/xaml"
        x:Class="Todo.Views.MainWindow"
        Icon="/Assets/avalonia-logo.ico"
        Width="200" Height="300"
        Title="Avalonia Todo"
        Content="{Binding Content}">
</Window>
And finally we need to make the "Add an item" button call MainWindowViewModel.AddItem().
Views/TodoListView.axaml
<UserControl xmlns="https://github.com/avaloniaui"
             xmlns:x="http://schemas.microsoft.com/winfx/2006/xaml"
             xmlns:d="http://schemas.microsoft.com/expression/blend/2008"
             xmlns:mc="http://schemas.openxmlformats.org/markup-compatibility/2006"
             mc:Ignorable="d" d:DesignWidth="200" d:DesignHeight="300"
             x:Class="Todo.Views.TodoListView">
  <DockPanel>
    <Button DockPanel.Dock="Bottom"
            Command="{Binding $parent[Window].DataContext.AddItem}">
      Add an item
    </Button>
    <ItemsControl Items="{Binding Items}">
      <ItemsControl.ItemTemplate>
        <DataTemplate>
          <CheckBox Margin="4"
                    IsChecked="{Binding IsChecked}"
                    Content="{Binding Description}"/>
        </DataTemplate>
      </ItemsControl.ItemTemplate>
    </ItemsControl>
  </DockPanel>
</UserControl>
The binding we've added to <Button> is:
Command="{Binding $parent[Window].DataContext.AddItem}"
There are a few parts to this:
- The
Button.Commandproperty describes a command to be called when the button is clicked - We're binding it to
$parent[Window].DataContext.AddItem:$parent[Window]means find an ancestor control of typeWindow- And get its
DataContext(i.e. aMainWindowViewModelin this case) - And bind to the
AddItemmethod on that view model
This will cause the MainWindowViewModel.AddItem() method to be invoked when the button is clicked.
If you're familiar with WPF or UWP you may think it strange that we're binding Button.Command to a method. This is a convenience feature of Avalonia which means that you don't have to create an ICommand for simple commands that are always enabled.
Run the application
If you now run the application and click the "Add an item" button you should see the new view appear.

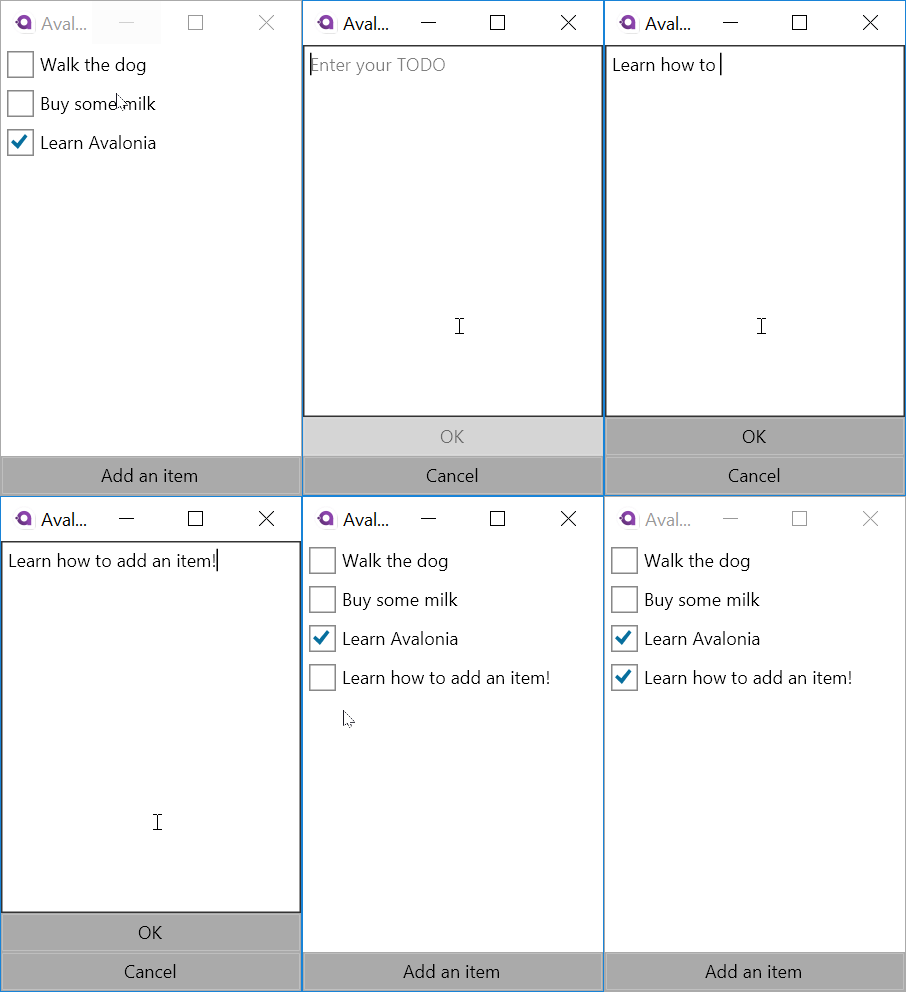
Now we have the "Add new item" view appearing we need to make it work. In particular we need to enable/disable the OK button depending on whether the user has typed anything in the Description.
Implement the OK and Cancel commands
In the last section we bound a Button.Command to a method on the view model, but if we want to be able to control the enabled state of the button we need to bind to an ICommand. Again we're going to take advantage of ReactiveUI and use ReactiveCommand.
ViewModels\AddItemViewModel.cs
using System.Reactive;
using ReactiveUI;
using Todo.Models;

namespace Todo.ViewModels
{
    class AddItemViewModel : ViewModelBase
    {
        string description;

        public AddItemViewModel()
        {
            var okEnabled = this.WhenAnyValue(
                x => x.Description,
                x => !string.IsNullOrWhiteSpace(x));

            Ok = ReactiveCommand.Create(
                () => new TodoItem { Description = Description },
                okEnabled);
            Cancel = ReactiveCommand.Create(() => { });
        }

        public string Description
        {
            get => description;
            set => this.RaiseAndSetIfChanged(ref description, value);
        }

        public ReactiveCommand<Unit, TodoItem> Ok { get; }
        public ReactiveCommand<Unit, Unit> Cancel { get; }
    }
}
First we modify the Description property to raise change notifications. We saw this pattern before in the main window view model. In this case though, we're implementing change notifications for ReactiveUI rather than for Avalonia specifically:
var okEnabled = this.WhenAnyValue(
    x => x.Description,
    x => !string.IsNullOrWhiteSpace(x));
Now that Description has change notifications enabled we can use WhenAnyValue to convert the property into a stream of values in the form of an IObservable.
This above code can be read as:
- For the initial value of
Description, and for subsequent changes - Select the inverse of the result of invoking
string.IsNullOrWhiteSpace()with the value
This means that okEnabled represents a stream of bool values which will produce true when Description is a non-empty string and false when it is an empty string. This is exactly how we want the OK button to be enabled.
We then create a ReactiveCommand and assign it to the Ok property:
Ok = ReactiveCommand.Create(
    () => new TodoItem { Description = Description },
    okEnabled);
The second parameter to ReactiveCommand.Create controls the enabled state of the command, and so the observable we just created is passed there.
The first parameter is a lambda that is run when the command is executed. Here we simply create an instance of our model TodoItem with the description entered by the user.
We also create a command for the "Cancel" button:
Cancel = ReactiveCommand.Create(() => { });
The cancel command is always enabled so we don't pass an observable to control its state, we just pass an "execute" lambda which in this case does nothing.
Bind the OK and Cancel buttons
We can now bind the OK and Cancel buttons in the view to the Ok and Cancel commands we just created on the view model:
Views/AddItemView.axaml
<UserControl xmlns="https://github.com/avaloniaui"
             xmlns:x="http://schemas.microsoft.com/winfx/2006/xaml"
             xmlns:d="http://schemas.microsoft.com/expression/blend/2008"
             xmlns:mc="http://schemas.openxmlformats.org/markup-compatibility/2006"
             mc:Ignorable="d" d:DesignWidth="200" d:DesignHeight="300"
             x:Class="Todo.Views.AddItemView">
  <DockPanel>
    <Button DockPanel.Dock="Bottom" Command="{Binding Cancel}">Cancel</Button>
    <Button DockPanel.Dock="Bottom" Command="{Binding Ok}">OK</Button>
    <TextBox AcceptsReturn="False"
             Text="{Binding Description}"
             Watermark="Enter your TODO"/>
  </DockPanel>
</UserControl>
If you run the application and go to the "Add Item" view you should now see that the OK button is only enabled when text has been entered in the description TextBox.
Handle the OK and Cancel button
We now need to react to the OK or Cancel buttons being pressed and re-show the list. If OK was pressed we also need to add the new item to the list. We'll implement this functionality in MainWindowViewModel:
ViewModels/MainWindowViewModel.cs
using System;
using System.Reactive.Linq;
using ReactiveUI;
using Todo.Models;
using Todo.Services;

namespace Todo.ViewModels
{
    class MainWindowViewModel : ViewModelBase
    {
        ViewModelBase content;

        public MainWindowViewModel(Database db)
        {
            Content = List = new TodoListViewModel(db.GetItems());
        }

        public ViewModelBase Content
        {
            get => content;
            private set => this.RaiseAndSetIfChanged(ref content, value);
        }

        public TodoListViewModel List { get; }

        public void AddItem()
        {
            var vm = new AddItemViewModel();

            Observable.Merge(
                vm.Ok,
                vm.Cancel.Select(_ => (TodoItem)null))
                .Take(1)
                .Subscribe(model =>
                {
                    if (model != null)
                    {
                        List.Items.Add(model);
                    }

                    Content = List;
                });

            Content = vm;
        }
    }
}
There are a few parts to the added code:
Observable.Merge(vm.Ok, vm.Cancel.Select(_ => (TodoItem)null))
This code takes advantage of the fact that ReactiveCommand is itself an observable which produces a value each time the command is executed. You'll notice that when we defined the commands they had slightly different declarations:
public ReactiveCommand<Unit, TodoItem> Ok { get; }
public ReactiveCommand<Unit, Unit> Cancel { get; }
The second type parameter to ReactiveCommand specifies the type of result it produces when the command is executed. Ok produces a TodoItem while Cancel produces a Unit. Unit is the reactive version of void. It means the command produces no value.
Observable.Merge combines the output from any number of obervables and merges them into a single observable stream. Because they're being merged into a single stream, they need to be of the same type. For this reason we call vm.Cancel.Select(_ => (TodoItem)null): this has the effect that every time the Cancel observable produces a value we select a null TodoItem.
.Take(1)
We're only interested in the first click of either the OK or Cancel button; once one of the buttons are clicked we don't need to listen for any more clicks. Take(1) means "just take the first value produced by the observable sequence".
.Subscribe(model =>
{
    if (model != null)
    {
        List.Items.Add(model);
    }

    Content = List;
});
Finally we subscribe to the result of the observable sequence. If the command resulted in a model being produced (i.e. OK was clicked) then add this model to the list. We then set Content back to List in order to display the list in the window and hide the "AddItemView".
Run the application
