Album Service
On this page, you will add some business logic to the app This will allow you to replace the mock data and get some real album data from the search. This business logic code forms the 'Model' part of the MVVM pattern.
To implement a real album search in the app, you will use a NuGet package that can call the Apple iTunes Web API album search.
Apple Web API Package
Follow this procedure to add the required NuGet package:
- Stop the app if it is still running.
- Right-click the project.
- Click Manage NuGet Packages.

- Type 'itunes' in the search box (top-left).
- Click iTunesSearch, then click Install.
MVVM Model
In this tutorial the application is simple, and you can implement the business services required for the 'Model' part of the MVVM pattern, in one class. This class will contain both the data model for an album, and the method needed for the search.
Follow this procedure to add the album business logic:
- In the solution explorer, right-click the /Models folder and then click Add.
- Click Class.
- When prompted for the name, type 'Album'.
- Add the following code:
using iTunesSearch.Library;
using System.Collections.Generic;
using System.Linq;
using System.Threading.Tasks;

namespace Avalonia.MusicStore.Models
{
    public class Album
    {
        private static iTunesSearchManager s_SearchManager = new();

        public string Artist { get; set; }
        public string Title { get; set; }
        public string CoverUrl { get; set; }

        public Album(string artist, string title, string coverUrl)
        {
            Artist = artist;
            Title = title;
            CoverUrl = coverUrl;
        }

        public static async Task<IEnumerable<Album>> SearchAsync(string searchTerm)
        {
            var query = await s_SearchManager.GetAlbumsAsync(searchTerm)
                .ConfigureAwait(false);

            return query.Albums.Select(x =>
                new Album(x.ArtistName, x.CollectionName,
                    x.ArtworkUrl100.Replace("100x100bb", "600x600bb")));
        }
    }
}
Album View Model
In order to display the data from the Web API for each album (data model) in the search results list, you will create an album view model, and this will be bound to the album view (tile) for display.
Your album view model is currently empty. It will need to be able to store the album data from the search, and have some properties for the artist name and album title. These will then be bound to the view for display.
In this step you will use a common pattern for the dependent relationship between a view model and a (business logic) model. This is where the view model contains an instance of the data model, and then exposes certain of its properties, as required for display.
Follow this procedure to prepare the album view model:
- Locate and open the AlbumViewModel.cs file.
- Add the code as shown:
private readonly Album _album;

public AlbumViewModel(Album album)
{
    _album = album;
}

public string Artist => _album.Artist;

public string Title => _album.Title;
Note that as the view model properties will not change in the UI during runtime, they have no setter and a plain getter - there is no need to use the RaiseAndSetIfChanged method here.
Start the Search
In this step, you will add some code to the music store view model so that whenever the search text changes, the SearchAsync method on the album model (business service) is started. When it finishes, the search places its results in the observable collection SearchResults. This collection is already bound to the list box, so with a small adjustment to the album view, the results of the search will display as the tiles you prepared earlier.
Follow this procedure to start the search whenever the search text changes:
- Locate and open the MusicStoreViewModel.cs file.
- Replace the constructor code, and add the extra code as shown:
using Avalonia.MusicStore.Models;
using ReactiveUI;
using System;
using System.Collections.ObjectModel;
using System.Reactive.Linq;
using System.Threading;

namespace Avalonia.MusicStore.ViewModels
{
    public class MusicStoreViewModel : ViewModelBase
    {
        ...

        public MusicStoreViewModel()
        {
            this.WhenAnyValue(x => x.SearchText)
                .Throttle(TimeSpan.FromMilliseconds(400))
                .ObserveOn(RxApp.MainThreadScheduler)
                .Subscribe(DoSearch!);
        }

        private async void DoSearch(string s)
        {
            IsBusy = true;
            SearchResults.Clear();

            if (!string.IsNullOrWhiteSpace(s))
            {
                var albums = await Album.SearchAsync(s);

                foreach (var album in albums)
                {
                    var vm = new AlbumViewModel(album);
                    SearchResults.Add(vm);
                }
            }

            IsBusy = false;
        }
    }
}
The WhenAnyValue method is provided by the ReactiveUI framework as part of the ReactiveObject(inherited via ViewModelBase). The method takes a lambda expression parameter that gets the property you want to observe for changes. So in the above code, an event occurs whenever the user types to change the search text.
It will be good design to wait until the user has stopped typing before attempting to run the search. The Throttle method prevents the events being processed until the time span (400 milliseconds) is up. This means processing will not start until the user has stopped typing for 400 milliseconds or longer.
The ObserveOn method is required to ensure that the subscribed method is always called on the UI thread. In Avalonia UI applications, you must always update the UI on the UI thread.
Lastly, the Subscribe method calls the DoSearch method for each observed event. The DoSearch method runs asynchronously, and has no return value.
Bind the Album View
Your work on the previous page to format the album 'tile' view did not add any way to display the text results of the search.
Follow this procedure to add the album name and artist name to the tile:
- Locate and open the AlbumView.asaml file.
- Add the two text block controls with their data bindings, as shown:
- To have compiled binding working, you need to indicate the datatype used in the view : AlbumViewModel.
<UserControl ...
  xmlns:vm="using:Avalonia.MusicStore.ViewModels"
  x:DataType="vm:AlbumViewModel" >

  <StackPanel Spacing="5" Width="200">
    <Border CornerRadius="10" ClipToBounds="True">
      <Panel Background="#7FFF22DD">
        <Image Width="200" Stretch="Uniform" />
        <Panel Height="200">
          <PathIcon Height="75" Width="75" Data="{StaticResource music_regular}" />
        </Panel>
      </Panel>
    </Border>
    <TextBlock HorizontalAlignment="Center" Text="{Binding Title}"/>
    <TextBlock HorizontalAlignment="Center" Text="{Binding Artist}"/>
  </StackPanel>
</UserControl>
- Click Debug to compile and run the project.
- Click the icon button.
- Type some search text.
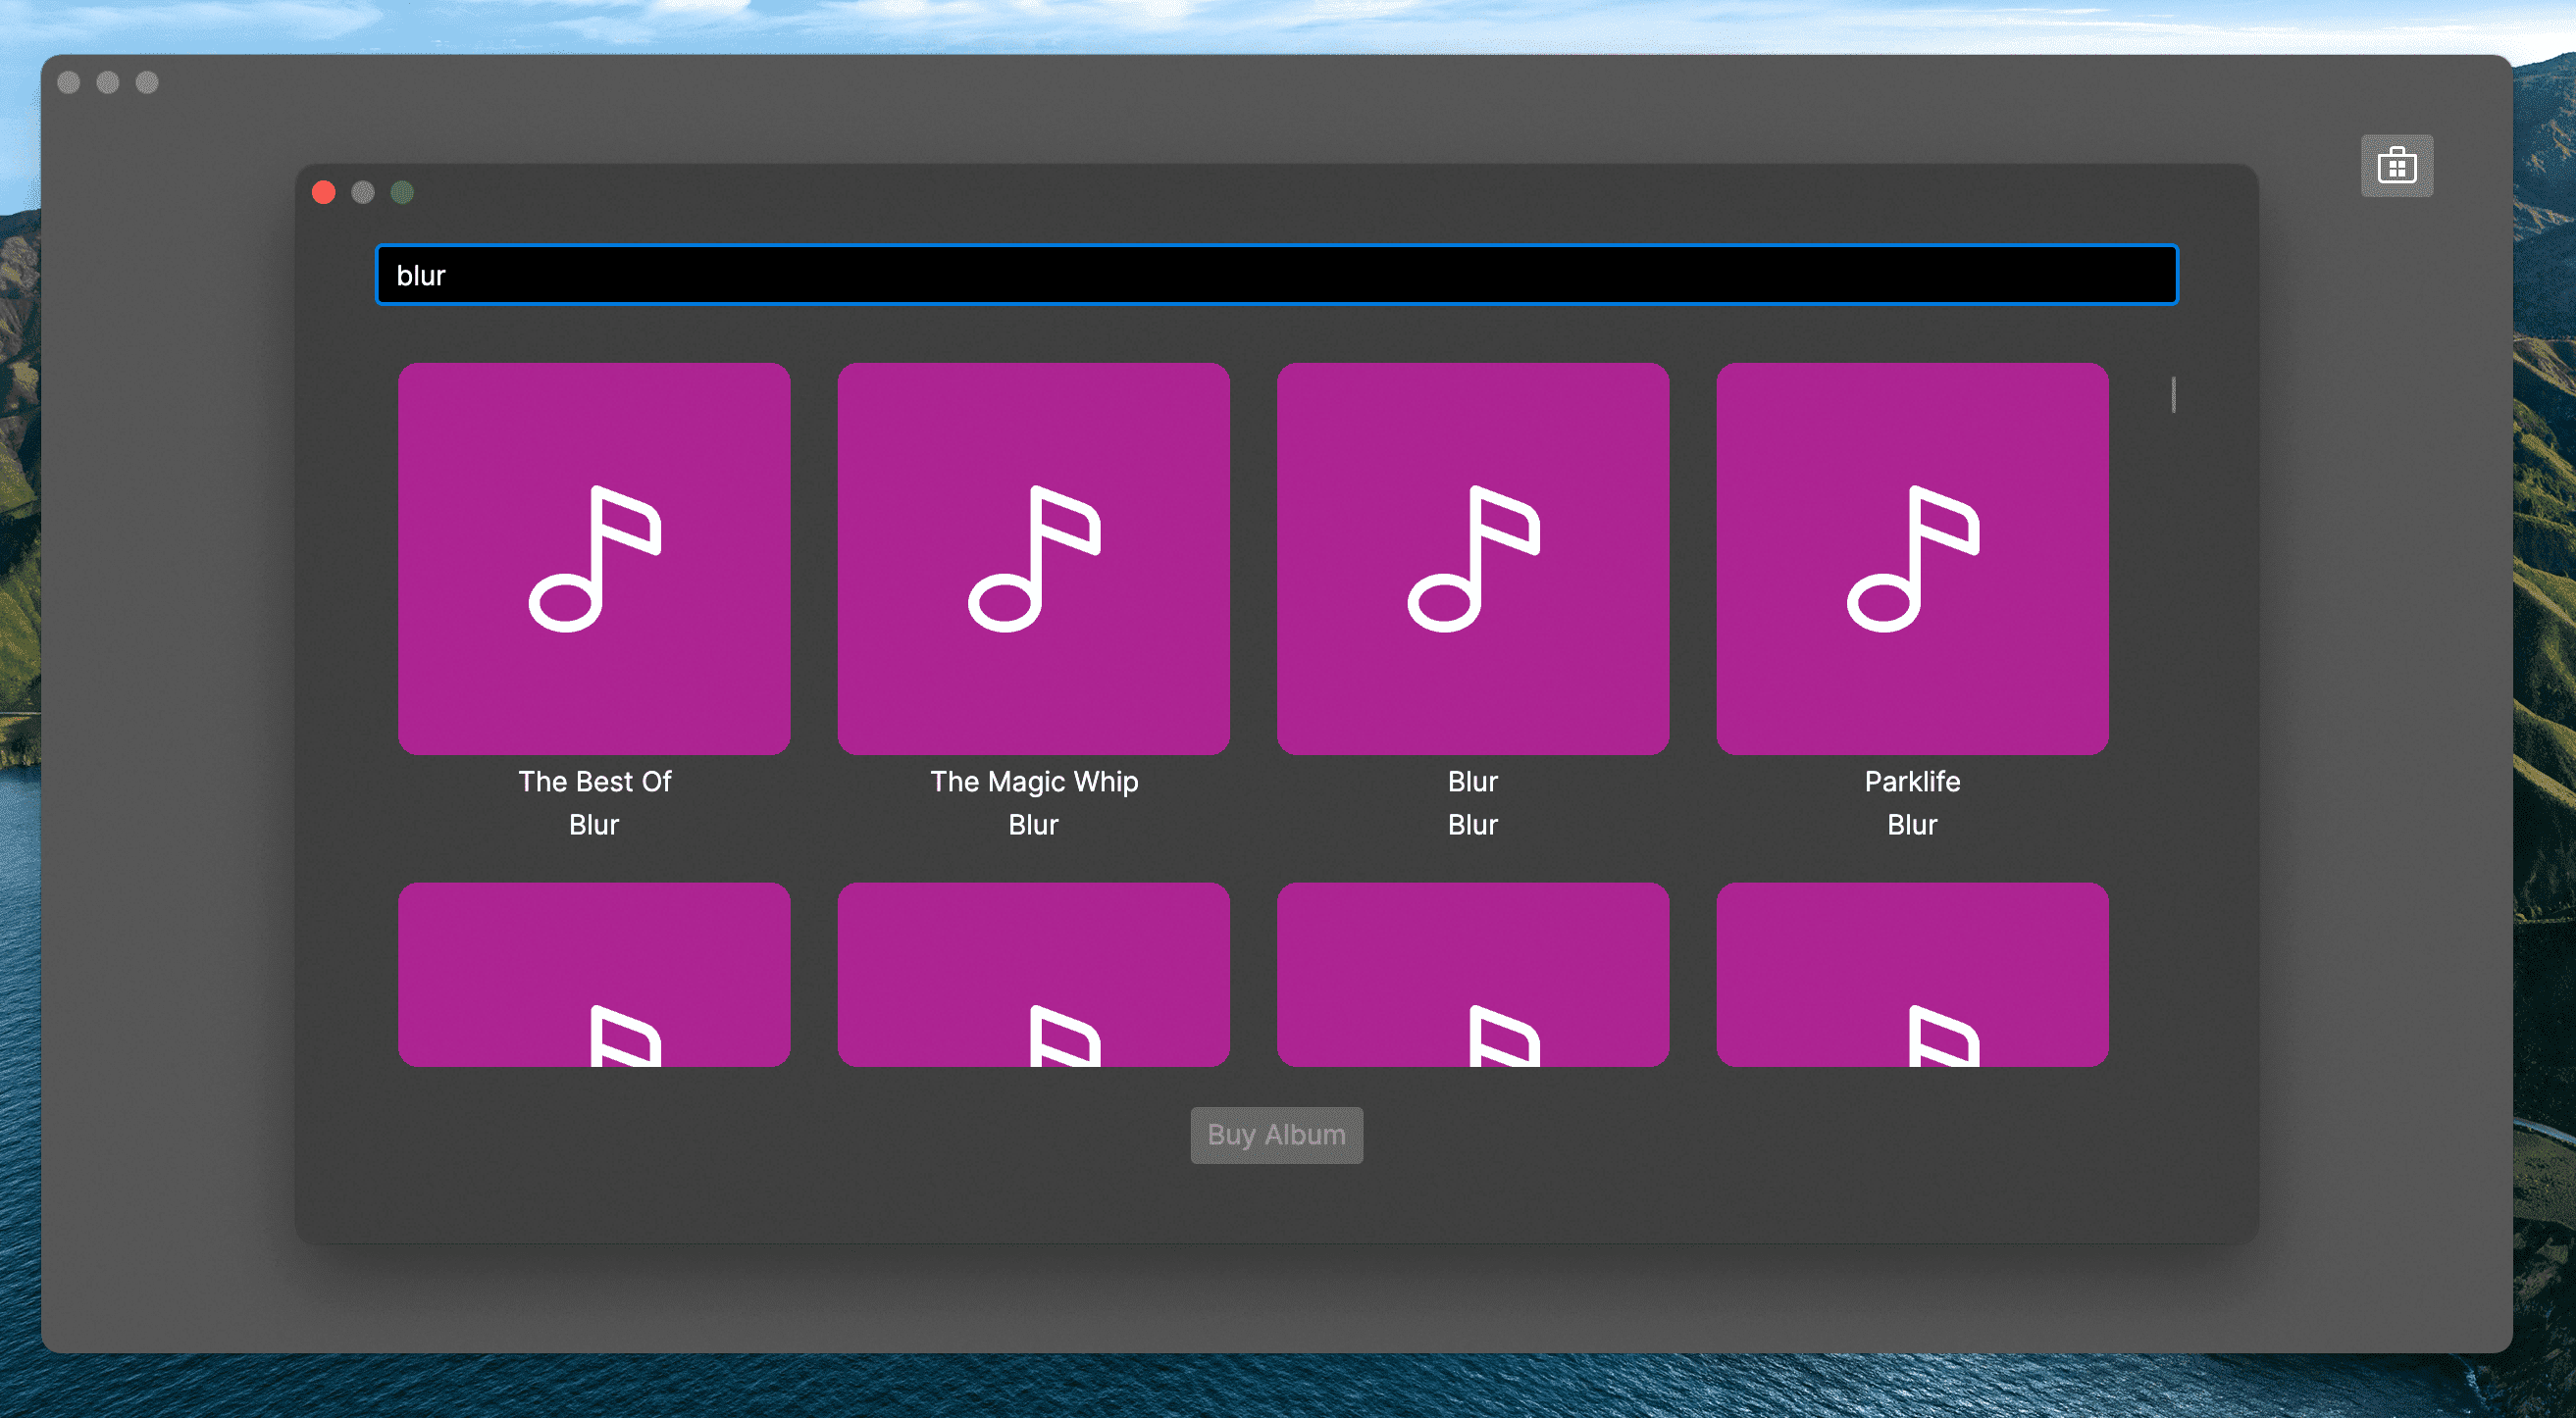
On the next page, you will learn how to improve the look of the app by retrieving the cover art for each album. This will be displayed on the tile instead of the note icon.