路由
ReactiveUI 路由由包含当前 RoutingState 的 IScreen、多个 IRoutableViewModel 和一个特定于平台的 XAML 控件 RoutedViewHost 组成。RoutingState 管理视图模型导航堆栈,并允许视图模型导航到其他视图模型。IScreen 是导航堆栈的根;尽管名称如此,但它的视图不必占据整个屏幕。RoutedViewHost 监视 RoutingState 的实例,通过创建和嵌入适当的视图来响应导航堆栈中的任何更改。
路由示例
从 Avalonia 模板创建一个新的空项目。要使用这些模板,请克隆 avalonia-dotnet-templates 存储库,安装模板,并基于 avalonia.app 模板创建一个名为 RoutingExample 的新项目。将 Avalonia.ReactiveUI 包安装到项目中。
git clone https://github.com/AvaloniaUI/avalonia-dotnet-templates
dotnet new --install ./avalonia-dotnet-templates
dotnet new avalonia.app -o RoutingExample
cd ./RoutingExample
dotnet add package Avalonia.ReactiveUI
FirstViewModel.cs
首先,创建可路由的视图模型和相应的视图。我们从 ReactiveUI 命名空间中的 IRoutableViewModel 接口派生可路由的视图模型,并且也从 ReactiveObject 派生。ReactiveObject 是视图模型类的基类,并实现了 INotifyPropertyChanged。
namespace RoutingExample
{
    public class FirstViewModel : ReactiveObject, IRoutableViewModel
    {
        // 拥有可路由视图模型的 IScreen 引用。
        public IScreen HostScreen { get; }

        // 可路由视图模型的唯一标识符。
        public string UrlPathSegment { get; } = Guid.NewGuid().ToString().Substring(0, 5);

        public FirstViewModel(IScreen screen) => HostScreen = screen;
    }
}
FirstView.xaml
<UserControl xmlns="https://github.com/avaloniaui"
             xmlns:x="http://schemas.microsoft.com/winfx/2006/xaml"
             x:Class="RoutingExample.FirstView">
    <StackPanel HorizontalAlignment="Center"
                VerticalAlignment="Center">
        <TextBlock Text="Hi, I'm the first view!" />
        <TextBlock Text="{Binding UrlPathSegment}" />
    </StackPanel>
</UserControl>
```"

**FirstView.xaml.cs**

如果我们需要处理视图模型的激活和停用,那么我们在视图中添加一个调用WhenActivated的方法。一般来说,一个经验法则是始终在视图中添加WhenActivated,详见[Activation](../../concepts/reactiveui/view-activation)文档了解更多信息。

```csharp
namespace RoutingExample
{
    public class FirstView : ReactiveUserControl<FirstViewModel>
    {
        public FirstView()
        {
            this.WhenActivated(disposables => { });
            AvaloniaXamlLoader.Load(this);
        }
    }
}
MainWindowViewModel.cs
然后,创建一个实现IScreen接口的视图模型。它包含管理导航堆栈的当前RoutingState。RoutingState还包含一些辅助命令,允许您向后和向前导航。
实际上,您可以在应用程序中使用任意数量的IScreen。尽管名称如此,它不必占据整个屏幕。您可以使用嵌套路由,��在一侧放置IScreen等。
namespace RoutingExample
{
    public class MainWindowViewModel : ReactiveObject, IScreen
    {
        // 与此Screen关联的Router。
        // IScreen接口所需。
        public RoutingState Router { get; } = new RoutingState();

        // 导航用户到第一个视图模型的命令。
        public ReactiveCommand<Unit, IRoutableViewModel> GoNext { get; }

        // 导航用户返回的命令。
        public ReactiveCommand<Unit, IRoutableViewModel> GoBack => Router.NavigateBack;

        public MainWindowViewModel()
        {
            // 管理路由状态。使用Router.Navigate.Execute命令导航到不同的视图模型。
            //
            // 注意,Navigate.Execute方法接受一个视图模型的实例,这允许您向视图模型传递参数,或者重用现有的视图模型。
            //
            GoNext = ReactiveCommand.CreateFromObservable(
                () => Router.Navigate.Execute(new FirstViewModel(this))
            );
        }
    }
}
MainWindow.xaml
现在我们需要将RoutedViewHost XAML控件放置在我们的主视图中。它将根据提供的IViewLocator实现和传递的Router实例(类型为RoutingState)解析和嵌入适当的视图模型。请注意,您需要导入rxui命名空间以使RoutedViewHost正常工作。此外,您可以在XAML中重写RoutedViewHost.PageTransition属性,以覆盖RoutedViewHost更改视图时播放的动画。对于来自MyGet的最新构建,请使用xmlns:rxui="https://reactiveui.net",对于NuGet上的0.8.0版本,请使用xmlns:rxui="clr-namespace:Avalonia;assembly=Avalonia.ReactiveUI",如下面的示例所示。
<Window xmlns="https://github.com/avaloniaui"
        xmlns:rxui="clr-namespace:Avalonia.ReactiveUI;assembly=Avalonia.ReactiveUI"
        xmlns:app="clr-namespace:RoutingExample"
        xmlns:x="http://schemas.microsoft.com/winfx/2006/xaml"
        xmlns:d="http://schemas.microsoft.com/expression/blend/2008"
        xmlns:mc="http://schemas.openxmlformats.org/markup-compatibility/2006"
        mc:Ignorable="d" d:DesignWidth="800" d:DesignHeight="450"
        x:Class="RoutingExample.MainWindow"
        Title="RoutingExample">
    <Grid>
        <Grid.RowDefinitions>
            <RowDefinition Height="*" />
            <RowDefinition Height="Auto" />
        </Grid.RowDefinitions>
        <rxui:RoutedViewHost Grid.Row="0" Router="{Binding Router}">
            <rxui:RoutedViewHost.DefaultContent>
                <TextBlock Text="Default content"
                           HorizontalAlignment="Center"
                           VerticalAlignment="Center" />
            </rxui:RoutedViewHost.DefaultContent>
            <rxui:RoutedViewHost.ViewLocator>
                <!-- See AppViewLocator.cs section below -->
                <app:AppViewLocator />
            </rxui:RoutedViewHost.ViewLocator>
        </rxui:RoutedViewHost>
        <StackPanel Grid.Row="1" Orientation="Horizontal" Margin="15">
            <StackPanel.Styles>
                <Style Selector="StackPanel > :is(Control)">
                    <Setter Property="Margin" Value="2"/>
                </Style>
                <Style Selector="StackPanel > TextBlock">
                    <Setter Property="VerticalAlignment" Value="Center"/>
                </Style>
            </StackPanel.Styles>
            <Button Content="Go next" Command="{Binding GoNext}" />
            <Button Content="Go back" Command="{Binding GoBack}" />
            <TextBlock Text="{Binding Router.NavigationStack.Count}" />
        </StackPanel>
    </Grid>
</Window>
要禁用动画,只需将RoutedViewHost.PageTransition属性设置为{x:Null},如下所示:
<rxui:RoutedViewHost Grid.Row="0" Router="{Binding Router}" PageTransition="{x:Null}">
    <rxui:RoutedViewHost.DefaultContent>
        <TextBlock Text="Default content"
                   HorizontalAlignment="Center"
                   VerticalAlignment="Center" />
    </rxui:RoutedViewHost.DefaultContent>
</rxui:RoutedViewHost>
AppViewLocator.cs
我们在上面显示的MainWindow.xaml标记中传递给RoutedViewHost控件的AppViewLocator负责根据ViewModel的类型解析View。类型为RoutingState的IScreen.Router实例确定当前应显示哪个ViewModel。有关详细信息,请参阅View Location。基于模式匹配的最简单的IViewLocator实现可能如下所示:
namespace RoutingExample
{
    public class AppViewLocator : ReactiveUI.IViewLocator
    {
        public IViewFor ResolveView<T>(T viewModel, string contract = null) => viewModel switch
        {
            FirstViewModel context => new FirstView { DataContext = context },
            _ => throw new ArgumentOutOfRangeException(nameof(viewModel))
        };
    }
}
MainWindow.xaml.cs
这是上面声明的MainWindow.xaml的代码后台。
namespace RoutingExample
{
    public class MainWindow : ReactiveWindow<MainWindowViewModel>
    {
        public MainWindow()
        {
            this.WhenActivated(disposables => { });
            AvaloniaXamlLoader.Load(this);
        }
    }
}
App.axaml.cs
请确保在 App.axaml.cs 中初始化根视图的 DataContext。
public override void OnFrameworkInitializationCompleted()
{
    if (ApplicationLifetime is IClassicDesktopStyleApplicationLifetime desktop)
    {
        desktop.MainWindow = new MainWindow
        {
            DataContext = new MainWindowViewModel(),
        };
    }

    base.OnFrameworkInitializationCompleted();
}
最后,在你的 AppBuilder 中添加 .UseReactiveUI() :
namespace RoutingExample
{
    public static class Program
    {
        public static void Main(string[] args)
        {
            BuildAvaloniaApp().StartWithClassicDesktopLifetime(args);
        }

        public static AppBuilder BuildAvaloniaApp() =>
            AppBuilder.Configure<App>()
                .UseReactiveUI()
                .UsePlatformDetect()
                .LogToDebug();
    }
}
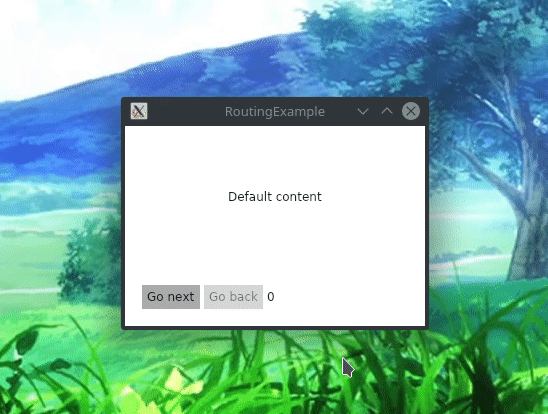
现在,您可以运行该应用程序并查看路由的效果!
dotnet run --framework netcoreapp2.1